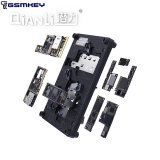
The i2C Face ID Programmer Kit Fixes Broken Face-ID on iPhone X, XS, XS Max, XR.
Dot Projector Repair Programmer Face ID - V8
The programmer actually supports iPhone X/XR/XS/XS Max/11/11 Pro/11 Pro Max/iPad A12X
The i2C Face ID V8 Programmer Full Repair Kit includes everything you need to repair broken Face-ID on iPhone Models.
COMPATIBILITY - The kit supports repair of Face-If on iPhone X, XS, XS Max, XR. Also compatible with iPhone 11 range although flex are not included in this pack.
TEST FUNCTION - Quickly identify a damaged flex before committing to replacement work with the TEST button on the IC" Face ID Programmer.
HOW DOES IT WORK - In short, use the I2C Programmer to Read and write Dot Projector Flex Data from damaged flex to supplied replacement flex. Then de-solder dot projector and re-solder it to the replacement flex.
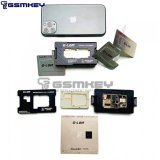
PACKAGE CONTENTS - [1 x I2C V8 Programmer] - [1 x Rework Fixture] - [1 x Reball Stencil] - [10 x Dot Projector Flex Cables - 4pcs X, 2pcs XR, 2pcs XS, 2pcs Xs Max].
Features
1. Offline read & write
2. Support models: For iPhone X/XR/XS/XS Max/11/11 Pro/11 Pro Max
3. Support Chinese & English menu switch
4. Non-trace repair, green pass the 3UTools
5. Chip non-removal low repair risk
6. Low power consumption and no current leakage
7. Can be adapted to the latest iOS system perfectly
Operation Process
1. Connect with original flex cable, press ‘Test’ button to test the flex cable condition
2. Press ‘Read’ button to read and save the data (Do not power off during the operation process to avoid loss of data )
3. Connect the i2C dot projector flex cable with host machine, then press ‘Write’ button to write the data. (Do not power off during the operation process to avoid loss of data)
4. Cut off the shielding cover soldering joint pads with grinding pen
5. Heat with hot air gun and separate the dot projector board from the glass lens with sculpture knife
6. Take down the MOSFET then short the pin as shown in the figure
7. Reball the pads on the flex cable
8. Apply solder paste then solder the dot projector board to the flex cable
9. Test the flex cable working condition after the soldering
10. Put the flex cable into shielding cover and keep the flex well aligned with glass lens